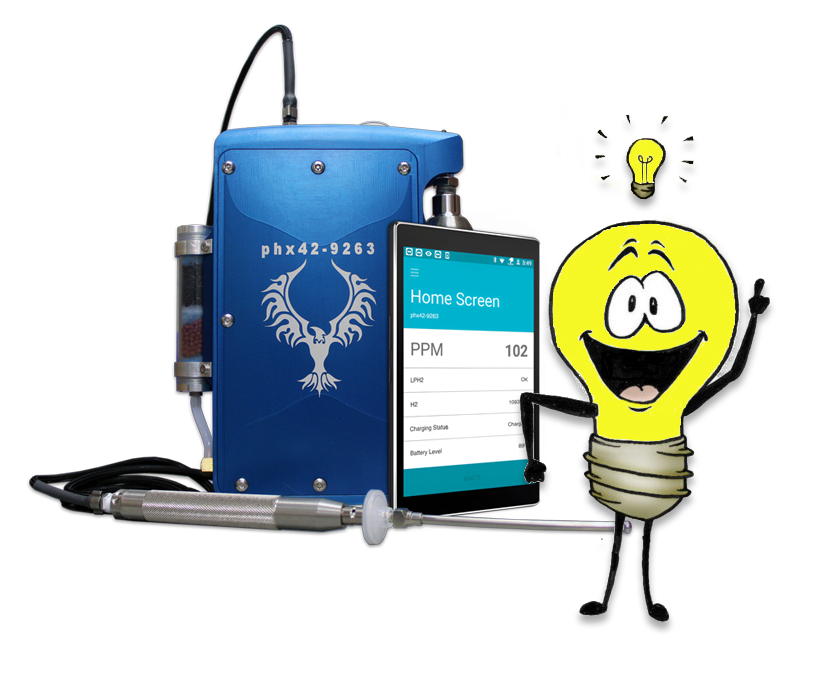
Overnight storage and calibration of the phx42 should be done indoors at or near room ambient conditions (15-25 °C or 59-77 °F) with a maximum humidity of 85%.

At the beginning of the day, you can triple-tap the power button to ignite the unit, or by using the app. After manually calibrating, or calibrating on a SpanBox, it is best to leave the phx42 ignited and running, uninterrupted, for the entire day. At the end of the day or when monitoring is finished, place the phx42 in “Sleep Mode” by quad-tapping the power button. Ensure the phx42 is stored in the environmental conditions stated above.

Note: The phx42 must be ignited for at least 15 minutes prior to calibration, drift, or any monitoring that will be performed. If the phx42 is used before it is warm, you may receive readings outside of the factory-specified accuracy ranges.

Contamination is a costly repair for the phx42 FID analyzer, also commonly known as a Toxic Vapor Analyzer or TVA*. To avoid contamination, you can follow these best practice steps:

  1. Weekly probe integrity inspection

  2. Daily self-check if not running Cal5.0

  3. Always have a filter installed during ignition

Then, PAY ATTENTION TO THE PROMPTS!

After attempting to ignite 3 times, run a self-check. Disregarding prompts may damage the phx42.

If you are running non-LDARtools monitoring software, you may not see the prompts mentioned above. To remediate this, you can install Firmware 5.192, which will allow you to see these numbered error PPM codes:

PPM Displayed Means…
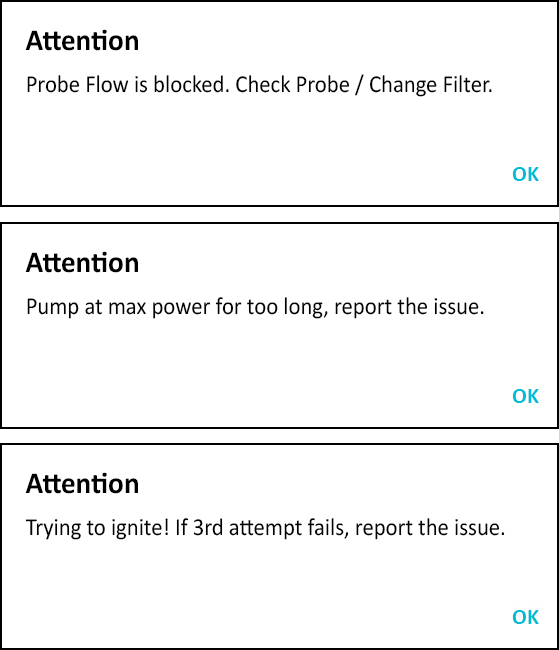
-40 Pump at max power for too long, report the issue.
-41 Probe Flow is blocked. Check Probe / Change Filter.
-42 Feels like you just removed my filter. Please give me a fresh filter so we can get back to work.
-45 Looks like we just found a high PPM leak. Wait 30 seconds and reignite me. (Chamber overtemp)
-46 Trying to ignite! If 3rd attempt fails, report the issue.

Contact support@ldartools.com with any questions or report an issue (we like logs!).

For a printable version of this Tech Tip, click here.

*This is a misnomer, but also a term the industry has accepted to describe portable FIDs.

Understanding the Impact of Filters on Portable FIDs

Filters are a key component in the efficient operation of portable FIDs (Flame Ionization Detectors). Their lifespan depends on usage hours and the environment, with water exposure being a critical factor. Technician diligence in maintaining these filters is crucial for the longevity of portable FIDs.

Our portable FID filters feature a pre-filter layer, enhancing their durability compared to standard 1um filters. This, along with the reduced flow of specific models like the phx42, ensures that filters in portable FIDs last significantly longer.
 

Probes Maintenance in Portable FIDs

Proper maintenance of probes is vital for the consistent performance of portable FIDs. Technician care can prevent frequent replacements. Considering a proactive replacement every six months can be more cost-effective, despite the common practice of only replacing them when leaks occur.
 

Battery Life in Portable FIDs

Batteries in portable FIDs generally have a lifespan of over three years. While it’s common to replace a battery in one out of six units before then, it’s advisable to buy replacements as needed, as batteries in portable FIDs often last longer while in use.
 

Glow Disks and Scrubber Media for Portable FIDs

Glow disks in portable FIDs can last long, especially with correct shutdown procedures and maintenance. Planning for one replacement per machine over a three-year period is a good practice. The life of Scrubber Media in portable FIDs also varies based on the operating environment.
 

Pumps in Portable FIDs

The sample pump, a critical component of portable FIDs, requires attention as it is susceptible to wear from various samples and chemicals. Estimating 1-2 pump replacements per machine over 3 years is a safe bet, although this can vary based on usage.
 

Final Thoughts on Portable FID Maintenance

Due to the variability in treatment and environment, maintaining portable FIDs can be challenging. Averages for maintenance schedules are often unreliable. Opting for an extended warranty could be a wise decision for ensuring the longevity and reliability of portable FIDs.
 

Disclaimer: This guide is based on general use cases of portable FIDs and may vary depending on specific conditions and handling of the equipment.

*This is a misnomer, but also a term the industry has accepted to describe portable FIDs.
Minimizing Downtime: The Importance of Charger Cord Care

In today’s fast-paced environment, minimizing downtime is crucial for maintaining efficiency and continuity. One aspect that often gets overlooked is the care of battery charger cords. Our recent data highlights how proper maintenance and care can lead to a reduction in charger failures, enhancing the overall operational efficiency.

A glance at the figures reveals essential insights into the current situation of phx42 sites and charger failures:

Total phx42 Sites: Out of 116 sites, a significant number, 95 sites, have reported zero charger failures.
Optimal Performance: 25 sites with five or more phx42s have not faced any charger issues, and 9 sites with ten or more phx42s also report no charger failures.
Sites Facing Issues: Unfortunately, 21 sites have reported at least one charger failure, and notably, 4 sites have had more than 50% of charger failures.

Charger Cord Care is Crucial

These statistics underscore the significance of meticulous charger cord care in preventing failures. The fact that a considerable number of sites have not encountered any charger failures attests to the effectiveness of proper maintenance.

Here are some practical tips to ensure the longevity and reliability of your charger cords:

Regular Inspection: Regularly inspect the cords for any visible damage or wear and tear. Replace damaged cords promptly to prevent failures.
Proper Storage: Avoid bending or twisting the cords excessively. Store them loosely coiled in a dry, cool place.

Proactive care for charger cords can significantly reduce failures, ensuring continuous and efficient operations. Embrace these simple maintenance tips to safeguard against unnecessary downtime and enhance operational reliability. Your commitment to charger cord care is a step forward in ensuring uninterrupted and efficient operations at your sites.

The figures speak volumes – let’s keep those numbers of failure low by prioritizing care for charger cords.


For more info, see the previously posted Tech Tip Here. 

Info by sites:

Category Count
Total phx42 sites 116
Sites with 5, or more, phx42s with NO charger failures 25
Sites with 10, or more, phx42s with NO charger failures 9
Number of sites that have had more than 50% of the charger failures 4
Sites with at least one charger failure 21
Sites with ZERO charger failures 95


What is a probe integrity inspection?

A probe integrity inspection is used to identify leaks too small to be detected during the probe block step of the self-check.

It involves connecting an ignited phx42 to a supply of zero air and running an alcohol-based wipe along the whole length of the probe, while watching the handheld for deflection.


When should a probe integrity inspection be performed?

The best practice is to conduct a probe integrity inspection every week and/or

anytime you have a drift/calibration failure or suspect a probe problem.


A probe integrity inspection is NOT…

  • A visual inspection
  • Blocking the probe tip
  • Swapping a suspected leaking probe with a “known” good probe

When should I use a Probe Testing Adapter?

You should use the Probe Testing Adapter (LDAR#4300) when a filter error is not resolved by following the on-screen prompts during a self-check.


Want more info, procedure and video? Download the full Tech Tip here. 

Thank you to everyone who participated in our first Annual phx Tech Tip Contest. We had great inquiries, and have found our top three winners.

  • First grand prize winner of $250 is Josolyn Rodriquez with HPC Industrial Group. Her ideas and presentation were spectacular. Congratulations!
  • Second winner is Ann McKeon with Renewable Energy Group. Thank you so much for your contributions and recommendations!
  • Third winner is Barry Selcer with HPC Industrial Group. We appreciate your ideas and participation!

We hope you all and more participate again next year!

phx42 Charger Care

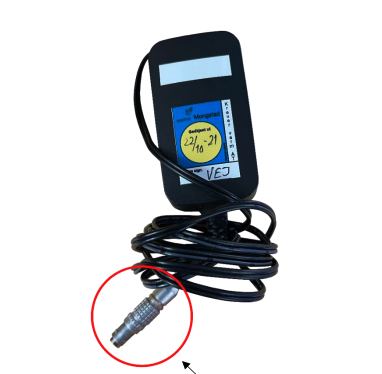
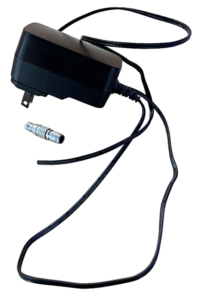
It is important to remember when unplugging the phx42 charger to pull by the charger connector only, and never by the power cord itself.
Continuous pulling on the cord will sever it from the charger connector (shown below-right).

By disconnecting the charger via the charger connector, as it was designed, you can prolong the life of your phx42 charger and avoid needing replacements due to damage.
Note: Due to the location of the charger port, the Bluetooth® antenna may interfere with disconnecting the charger when using your right hand. If you find this to be an issue, you can either use your left hand to remove the charger or rotate the phx42 180° to allow for easier access.

To get a pretty printable pdf, click here.

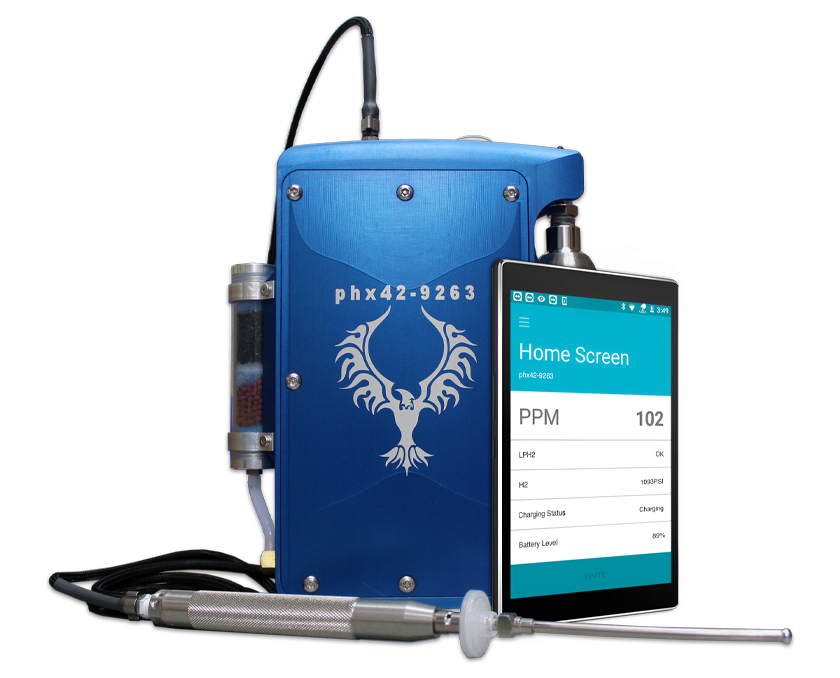
The self-check in the phxApp is used to anticipate critical issues with your phx42.

We recommend performing a self-check to diagnose, anticipate, and correct any problems that may occur with the phx42. If your phx42 requires an RMA, the diagnosis provided by the self-check will help us return your phx42 as soon as possible.

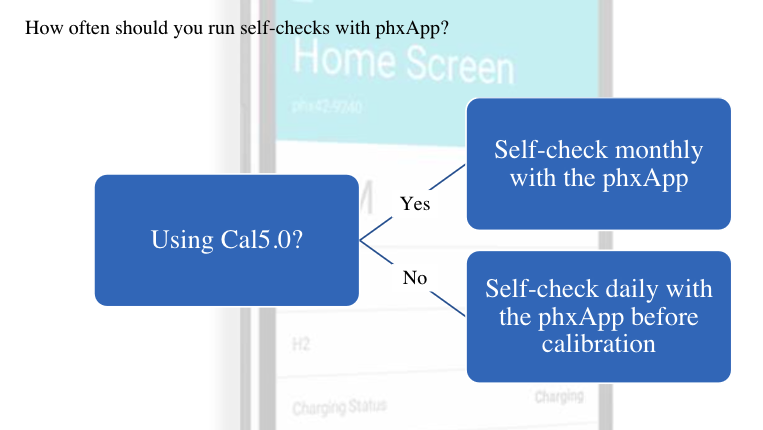
How often should you run self-checks with phxApp?

Self-check with the phxApp regularly allows you to:
•Verify the health of the unit
•Transfer logs (limit length)
•Calibrate your filter detection
•Report an issue if any operating parameter is out of range

To get a pretty printable pdf, click here.

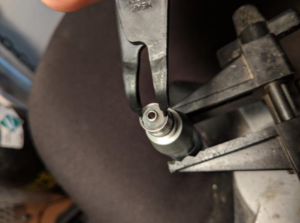
Breaking off the base of a probe tip phx42 filter can be frustrating but with the right removal procedure, you can quickly be back to work.

  1. Carefully use the tip of the pliers(LDAR #4217) to grab the outside of the plastic.
  2. Push the ends of the pliers firmly into place.
  3. Spin the plastic counterclockwise to screw it out of the filter base.

Important: Make sure not to touch the center tapered post. If this portion gets scratched or marred, it will need to be replaced.

For a printable version of this procedure, click here.

phx42 broken filter removal